From my limited web searches, there is a distinct dearth of tutorials on how to build terrain generators for Minecraft-like worlds. There are tutorials on how to build a terrain generator for a finite polygonal world, using such things as the Diamond-Square algorithm. And there are tutorials for how to setup a development environment for building Minecraft terrain generators. So here I will try to talk about how world generation works in those types of worlds. I’ll start with naive or otherwise boring ways of generating terrain, and then we’ll fix the problems in those to get better and better terrain.
A page that talks a lot about biome generation in Cuberite is http://mc-server.xoft.cz/docs/Generator.html. It touches on terrain shape, but mostly deals with macro effects. I want to delve into the smaller details - how to shape the terrain itself.
I assume you have Minecraft and some development environment setup to build terrain generators. I will be using Bukkit, which runs Java, but Cuberite is another option if you prefer C++. I will also be using a Java port of the C++ libnoise library.
I’ll also assume you’re reasonably good at programming, or know somebody who can teach you. Also, some experience with math’s concept of functions may be helpful when thinking about these things.
For the uninitiated, Minecraft’s terrain is arranged in blocks aligned to a grid. These blocks are grouped into 16×16 by 256 tall “chunks”, and these are what terrain generators spit out. In Bukkit, these terrain generators are subclasses of “ChunkGenerator.”
Either way, the goal of a terrain generator is to populate these chunks. A lot of algorithms that design artificial terrain work with heightmaps, so let’s start by doing the same. We want to generate a height value for each “column” in the chunk. Chunks are arranged with X and Z axes aligned to the two short axes and the Y axis aligned to the long vertical axis. For historical reasons, Minecraft traditionally places sea level at Y=64, so we’ll adopt the same convention.
Doing It With Heightmaps
There exist many algorithms to generate heightmaps, so the first thought off the top of my head is to adapt the Diamond-Square algorithm to generate a heightmap for each chunk. There’s a few obvious problems with this right off the bat, though. For one, the chunk needs to be initialized to an initial height of some sort, but this could maybe be worked around using some concept of a “biome”. Also, any terrain features are restricted to these 16×16 regions, and so far there’s no information being passed from one chunk to the next, so there will be obvious boundaries along the chunk edges.
The issue of passing information from one chunk to the next is a big one. If one chunk has a hill, you want the chunk next to it to have a hill also. Intuitively, when generating a chunk, you could ask your neighbors “do you have a hill?” and if so, add a hill to yourself. But those neighbors would have to ask their neighbors, who would have to ask their neighbors, and so forth.
You could solve this by claiming that hills can only be finite in size. A chunk only needs to poll the chunks in a certain radius before it decides whether it has a hill or not.
But there is still a problem of consistency. Imagine someone starts playing in your world, and starts to walk North. After a while they turn West, then later South, then later East. Eventually they’ll have walked in a “C” shape, all the while the terrain generator has been building chunks based on the chunks that it had just generated, which the player is walking through. Now imagine the player starts walking North again, to close the C. At some point the terrain generator will have to generate a chunk that’s sandwiched between the chunks the player is in, and the chunks the player started in.
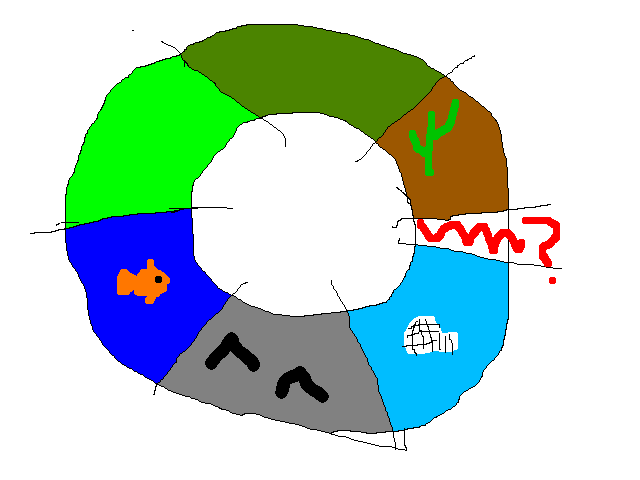
Here, the player starts in the brown desert and walks/swims in a circle until they get to the light blue arctic. Then the red scribble chunk needs to be generated - what makes sense between an arctic chunk and a hot desert chunk? This holds at a sub-biome level, too: what makes sense between a deep ocean chunk and a high mountain peak chunk?
You could try to keep track of all of these different factors, but it’s difficult and inelegant. We want something simple and elegant.
Introducing coherent noise.
Heightmaps With Coherent Noise
Many people think of random generators, such as Python’s “random” module, as random number generators. You ask it for a random number, and it gives you one. You call randInt() again, it gives you another one. But instead consider if you had a random function generator: If you give the generator a seed, say 1234, it gives you back a function. When you call this function you pass a parameter, say 1.0, and the function returns a random value. If you pass a different parameter, say 10.0, the function returns a different random value. But if you were to pass 1.0 over and over, every time the function returns the same “random” value (10.0, in this case).
If we used one of these functions, then a given chunk will always have the same terrain, no matter how we got to it (from the North, the South, or via teleportation). But with just any random function, each chunk is “random” (in some sense), so you might have a bunch of winter wasteland chunk and hot desert chunks all mixed together.
Coherent noise solves this. A coherent noise function is on where a small change in the input results in a small change in the output, but a large change in the input results in a random change in the output. For example, if f is our coherent noise function, if we know f(1.0) = 0.7, then we know that f(1.1) will be about 0.7. We know nothing about f(100), though - it could be 0.7, or it could be -0.7, or anything else. (I’ll let libnoise talk about how coherent noise is generated)
If we apply this to our chunks, we see that if a given chunk is a snowy wasteland, the neighboring chunk is likely to be a snowy wasteland. However, we have no idea what’s going to happen a thousand chunks away.
I’ve been talking in terms of biomes, but the same thing holds for terrain heightmaps. If some chunk is a hill, the neighboring chunk is likely to be a hill, but a thousand chunks away we have no idea what the terrain will be like - it could be a hill or it could be a deep ocean.
So let’s build our first algorithm: Heightmap generation with Perlin noise. For each x,z column in the 16×16 chunk, generate a height, and then fill everything below that height with dirt (or something). I’m using a 3D Perlin noise generator, so I have to give it 3 arguments: X, Y, Z. For X I’ll pass blockX/64, for Y I’ll pass 0, and for Z I’ll pass blockZ/64, where blockX and blockZ are the X and Z coordinates I’m considering. The output will be a number roughly in -1 to 1, so let’s multiply that by 10 and add 68. That gives us a random number roughly between 58 and 78.
The result:
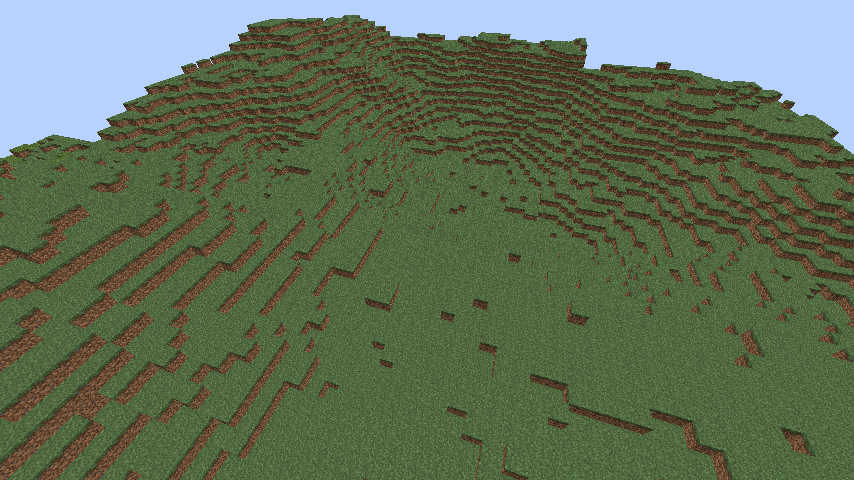
As you can see, we get nice rolling hills that are about 20 blocks tall valley-to-peak, with horizontal period (distance from one hill to the next) of around 64 blocks.
Of course, we can tweak our parameters to give different results. We could make the hills more like mountains:
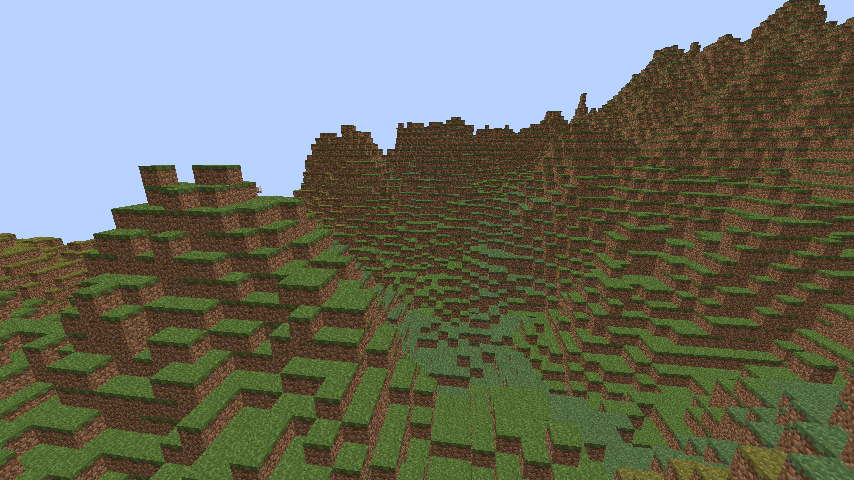
In this case, the mountains seem to have funny-shaped tops. The subtly different shades of green is Minecraft’s fault, since it has its own ideas about what biomes are here.
The definition of a “biome” is fairly straightforward in this generator. A biome is essentially a description of the average height (68, here), the height variation (+/- 10), and the period with which to query the coherent noise function (64 blocks, here - this is what we divided by).
Multiple Biomes
We probably want more than one biome, so we need to decide where different biomes are. One might use a random Voronoi generator, but there are more advanced methods discussed elsewhere. For now I’ll use a Voronoi generator, and I’ll define two biomes:
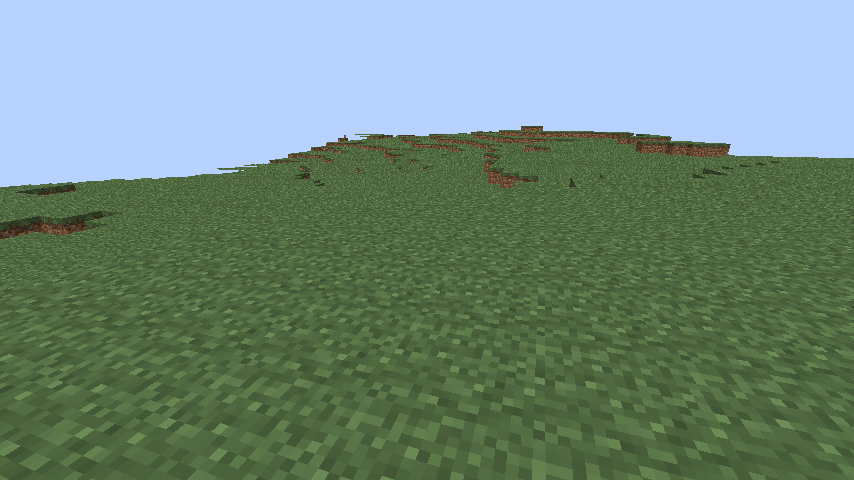
One “hilly” biome, with average height 80, variation +/-20, and period 48. The other is a “plains” biome, with average height 68, variation +/-5, and period 128. To distinguish the two, hills will be made of stone, and plains of grass.
If the Voronoi generator returns a value <0 for a point (remember, libnoise sources return in the range (-1, 1)), then we say it’s hilly. Otherwise it’s plains.
The plains look nice:
As do the mountains: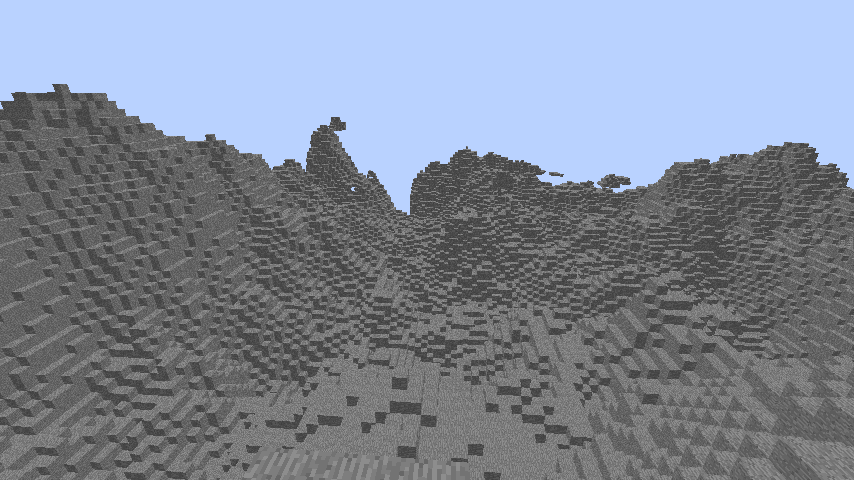
But the transition between the two leaves something to be desired: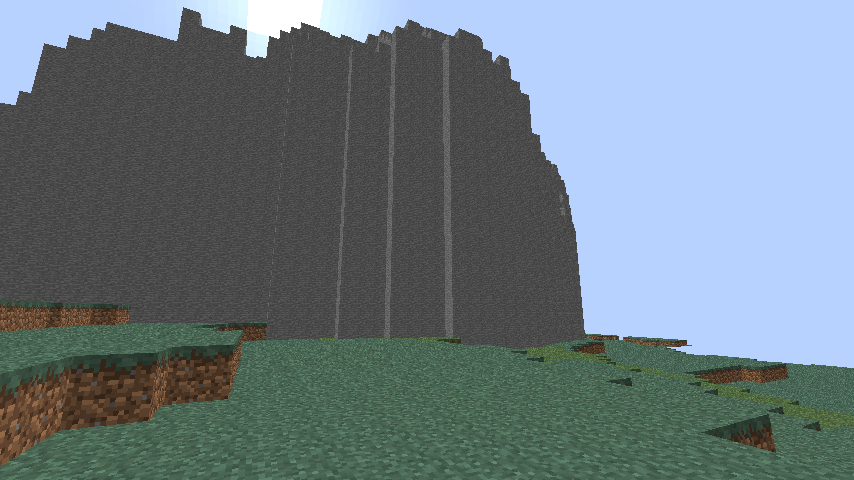
It’s a little sudden and foreboding, to say the least.
One method we could use would be to interpolate the biomes. If we’re near an edge between two biomes, maybe we should linearly interpolate the heightmap between the two biomes.
As a side note: Observe that so far, the biomes have all been using the same noise source (at least, I haven’t said otherwise), and they each query the noise source with different periods. Consider my two biomes above. Suppose that at the X,Z coordinate (480, 0) the world was a hilly biome, and that at (1280,0) the world was a plains biome. In the first case, the point we query the noise function with is (480⁄48, 0/48) = (10,0), and in the second the point is (1280⁄128,0/128) = (10,0), the same point. Since we’re passing the same value in, each block will get the same value, and so each of those chunks will “look” the same (they’ll have the same highs and lows, but they’ll be stretched according to the biome). This won’t do, so I’m going to use a separate noise source for each biome. For now, I’ll use two Perlin modules, one with seed seed, and another with seed seed+1.
Interpolating Biomes
Back to interpolation. To figure out the weights for our linear interpolation, let’s count up each of the biomes in the 15×15 square centered on the block in question, so _hillscount is the number of blocks that are hills, and _plainscount is the number of blocks that are plains. Then, to figure out the height of a given X,Z coordinate, compute the height if the column were a hills biome and if it were a plains biome, and linearly interpolate between the two:
_final_height = (hills_height * hills_count + plains_height * plains_count) / (hills_count + plainscount)
This gives us a nice boundary between biomes:
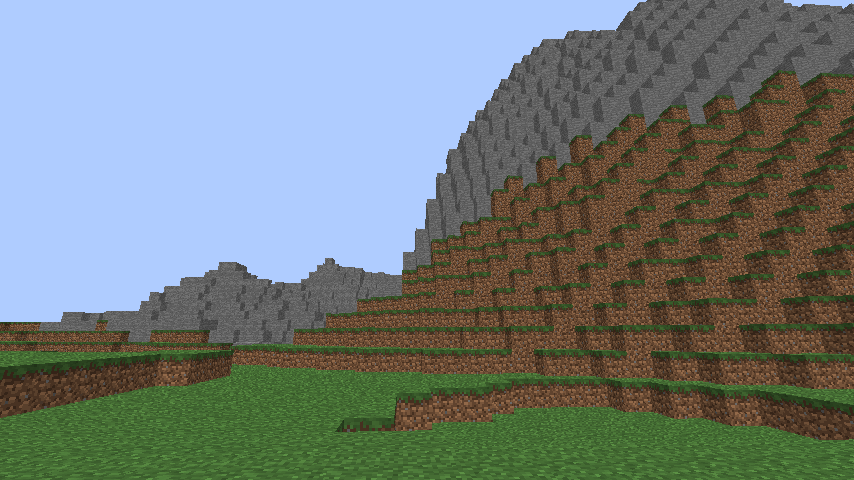
We start out with a nice, flat plains biome, which transitions into steep hills, without being too crazy.
Performance can be an issue here, since querying the biome for a large number of points (225) for every block can be expensive. Optimize as you see fit (caches and subsampling).
Another idea you might have had is, why not linearly interpolate between the parameters of the biome, to create a new boundary-biome? i.e., interpolate the values of average, variation, and so forth. The problem with this is that, since we have a different noise source for each biome, we have to decide what noise source to query, and so we’d have to interpolate the final noise source anyway.
If you go bouncing around one of these maps, you’ll notice that it’s very jagged, especially in the hilly biome. There are a lot of individual blocks that jut up, or single-block holes in the ground below. We can work around this using smoothing.
Smoothing
Smoothing is a fairly well-known algorithm already, so I won’t go into it too much. In short, instead of using a height value directly, you average it with some of the neighboring height values and use the result.
Note that, above, I mentioned the dangers of asking information from neighboring chunks. If we aren’t careful, those chunks would have to ask their neighbors, and the cycle never ends. However, here, we can ask neighboring blocks (and by extension, at the edges of our chunk, neighboring chunks) values like their unsmoothed height and their biome because these things can be computed without having to do anything very complicated.
Let’s apply a simple smoothing function, replacing the height of a column with the average pre-smoothing height of its 4 neighbor columns. (performance wise, it’s helpful if you cache pre-smoothed heights - if you don’t, you need to make 59,648 queries to noise functions per chunk!)
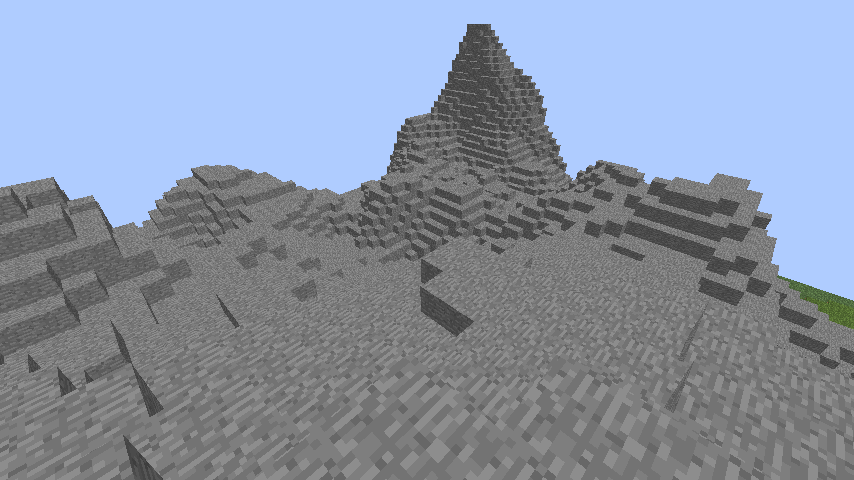
A much smoother terrain results. Of course, it might make sense to make the amount of smoothing vary by biome - perhaps mild hills have lots of smoothing, and severe hills have no smoothing whatsoever.
Thus far, I’ve talked largely about mechanics. I’ve handed out some equations and how to mash them together to generate a world. One way to get started in building your world is to grab the system we’ve built so far, and start adding biomes and tweaking parameters to get the results you want. But the real art behind building a custom world isn’t in tweaking parameters, it’s in tweaking the equations.
The Art Behind The Science
Here’s a list of the equations we have so far:
- The smoothing kernel.
- Biome interpolator. Right now this is a linear interpolation.
- Height transfer function (what maps the noise function output to the physical height). Right now this is linear.
- The coherent noise functions themselves, for both height and biome selection. Right now height is Perlin, biome selection is Voronoi.
Two coherent noise function families I’ve mentioned so far are Perlin and Voronoi. Perlin gives nice smooth blobby noise, while Voronoi gives solid regions in its output. But libnoise also provides “Billow” noise and “RidgedMulti” noise.
Biome Noise Source
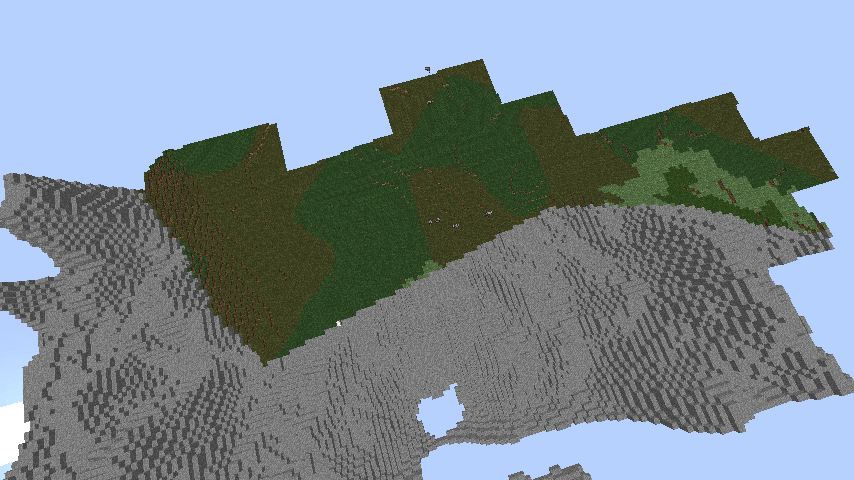
The choice for the coherent noise function for the biome generation changes the shape that biomes take. Voronoi, which I’ve been using so far, leads to an unsightly straight-line boundary at the edges of biomes:
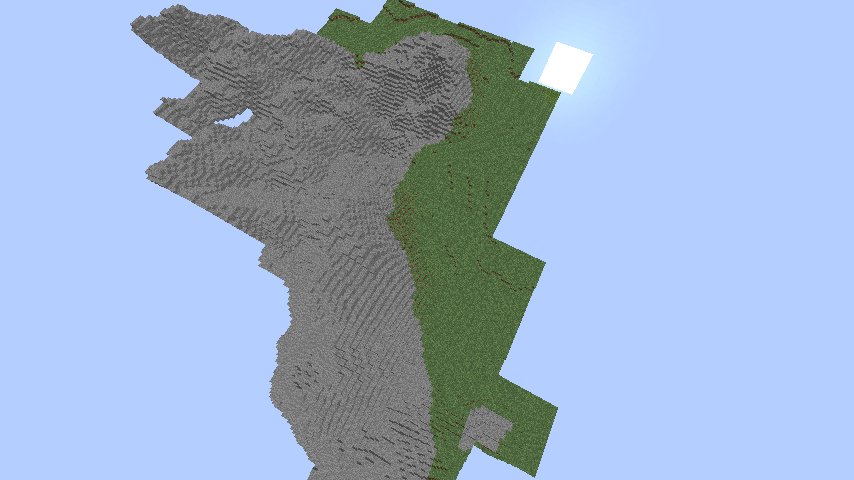
Whereas Perlin gives a more natural ebb and flow between biomes:
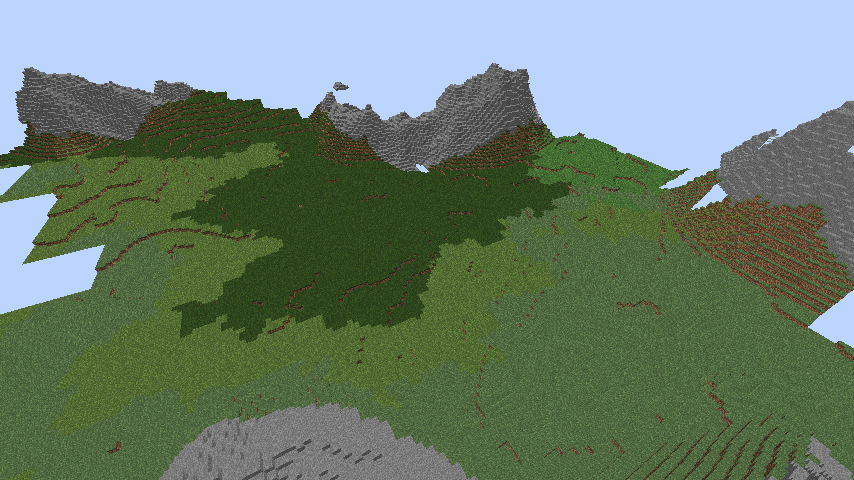
RidgedMulti gives a strandier noise, so it would be good for mountain ranges or sandbars or valleys:
Of course, you can combine multiple noise sources to get the effect you want. For example, you could add a river biome (with average height 64, and 0 variation), and have it snake through both hills and plains biomes. You can create two biome noise sources, a Perlin and a RidgedMulti. If the RidgedMulti’s value is greater than 0.8, then it’s a river biome. Otherwise, the biomes are divided as they were before, according to whether the Perlin noise is above or below zero. You get something like:
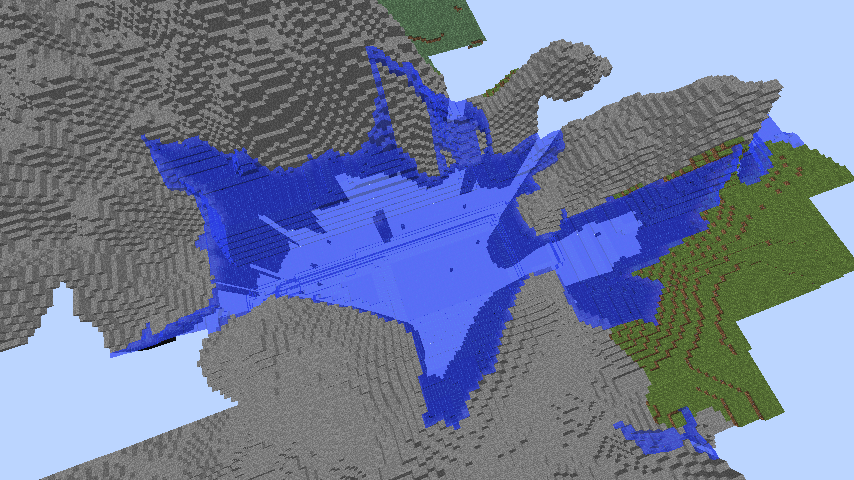
Of course, in this case, we’ve exposed a bug in how we interpolate between biomes: Sometimes a biome needs to exist at a fixed height, such as rivers being at Y=64, but the biome interpolator doesn’t support this correctly. We’ll ignore this for now, fixing this is an exercise for the reader.
Height Noise Source
The other noise function we can choose is the one that picks the height of the terrain. So far we’ve been dealing with Perlin, but we can choose RidgedMulti for hills just as well, and we get something like:
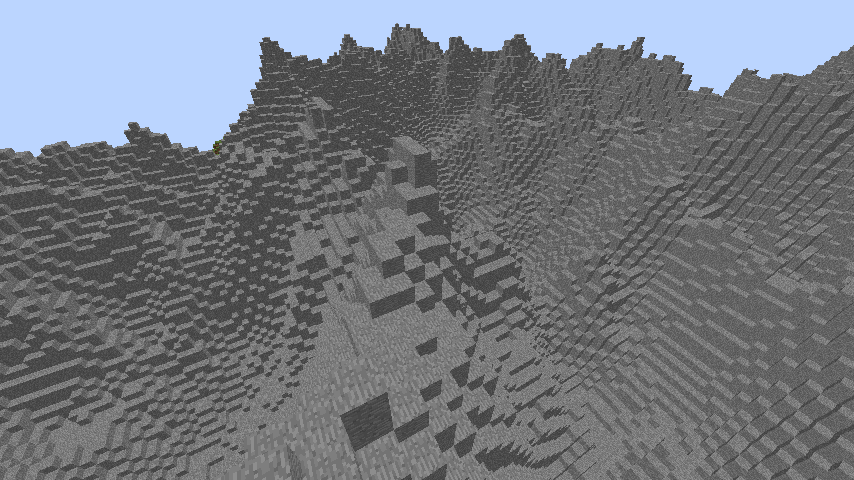
What used to be mountain peaks with Perlin turned into narrow mountain ridges, with wide valley basins below. We can change the hills noise function to Billow, and we get:
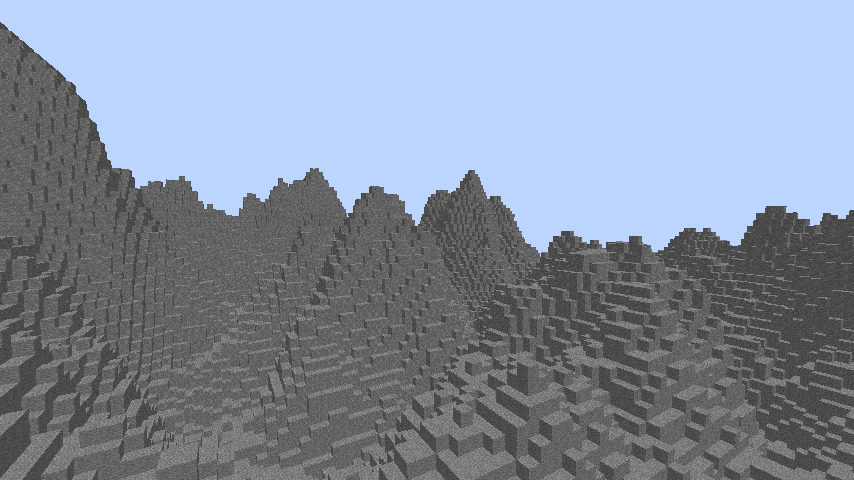
Much more uniform mountain peaks, with wider gaps between them than in Perlin.
There are any number of noise functions we can use, including ones that aren’t smooth, like Voronoi:
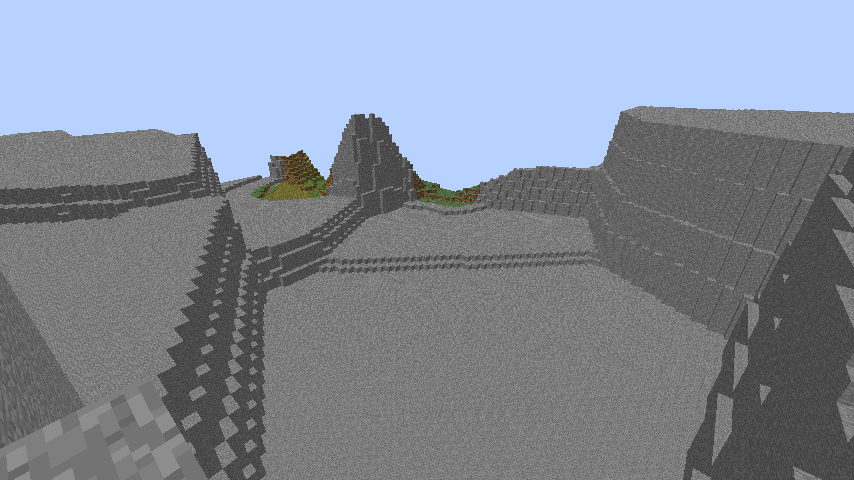
A very rigid mesa structure appears.
Noise-to-Height Transfer Function
Another thing we can play with is the noise transfer function. The linear function looks like:
height = variation * noise + average
Where noise is the output from the noise function. We could, instead, replace this by a quadratic by squaring the noise:
height = variation * noise * noise + average
noise ranges from -1 to 1. When you square a negative number, it becomes positive. When you square a number less than one, it becomes smaller, and becomes more smaller the smaller it was to start with (so 0.5 only decreases by half, but 0.1 becomes almost 0). The result of this is:
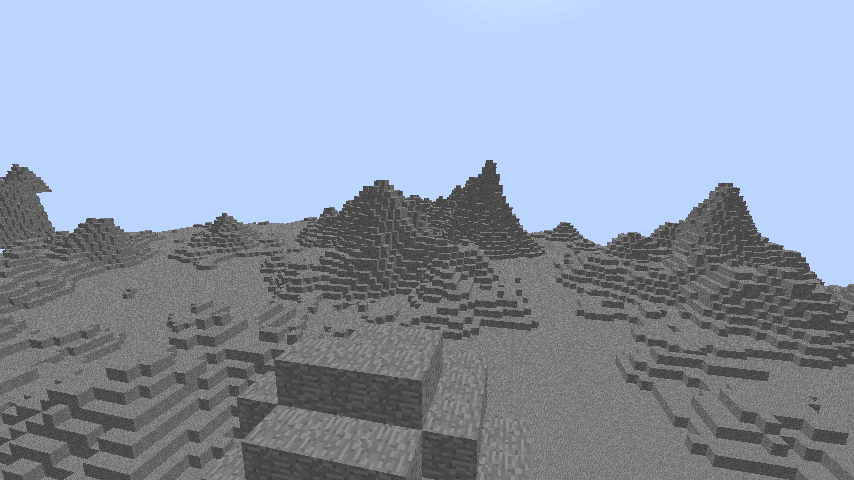
This is the same hills biome as before, with the Perlin noise and parameters average=80, variation=20, period=48, but with a new transfer function.
Of course, you could do all sorts of crazy things with it. You could take noise to the 5th power:
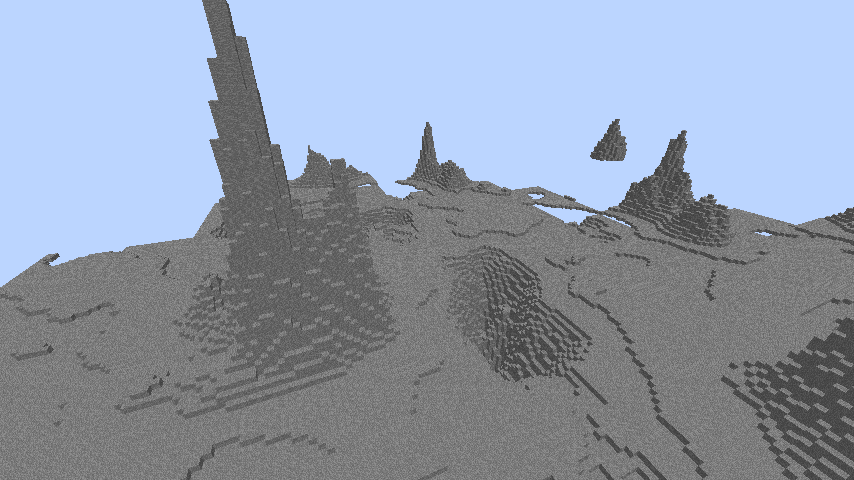
You end up with sharp peaks and sharp valleys, with flat regions inbetween.
Of course, there’s no reason it has to be a polynomial. It could be exponential, sinusoidal, or even the logistic function:
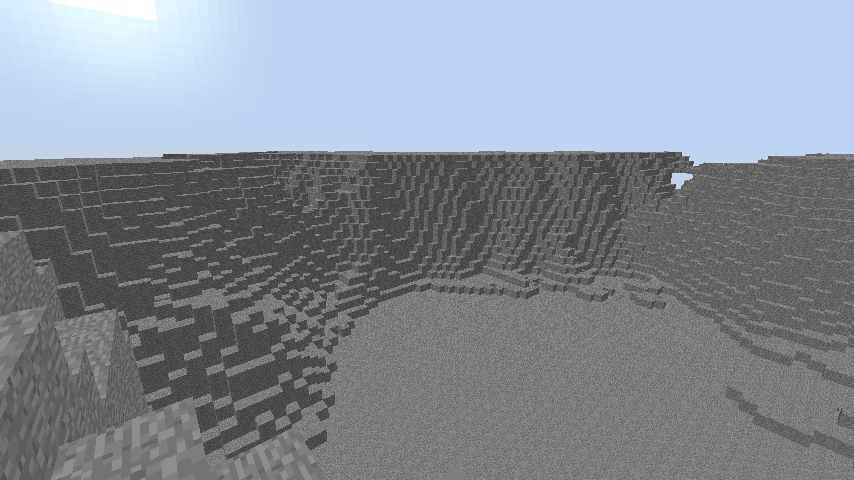
With the logistic function, you end up with more of a mesa-like terrain. Of course, you can define the transfer function on a per-biome level, so you could have a mesa biome and a hills biome, both with the same parameters but a different transfer function.
In principle, the height transfer function can be any mathematical function. Here I plotted the four functions I used above: linear (blue), quadratic (green), 5th-power (gold), and logistic (red).
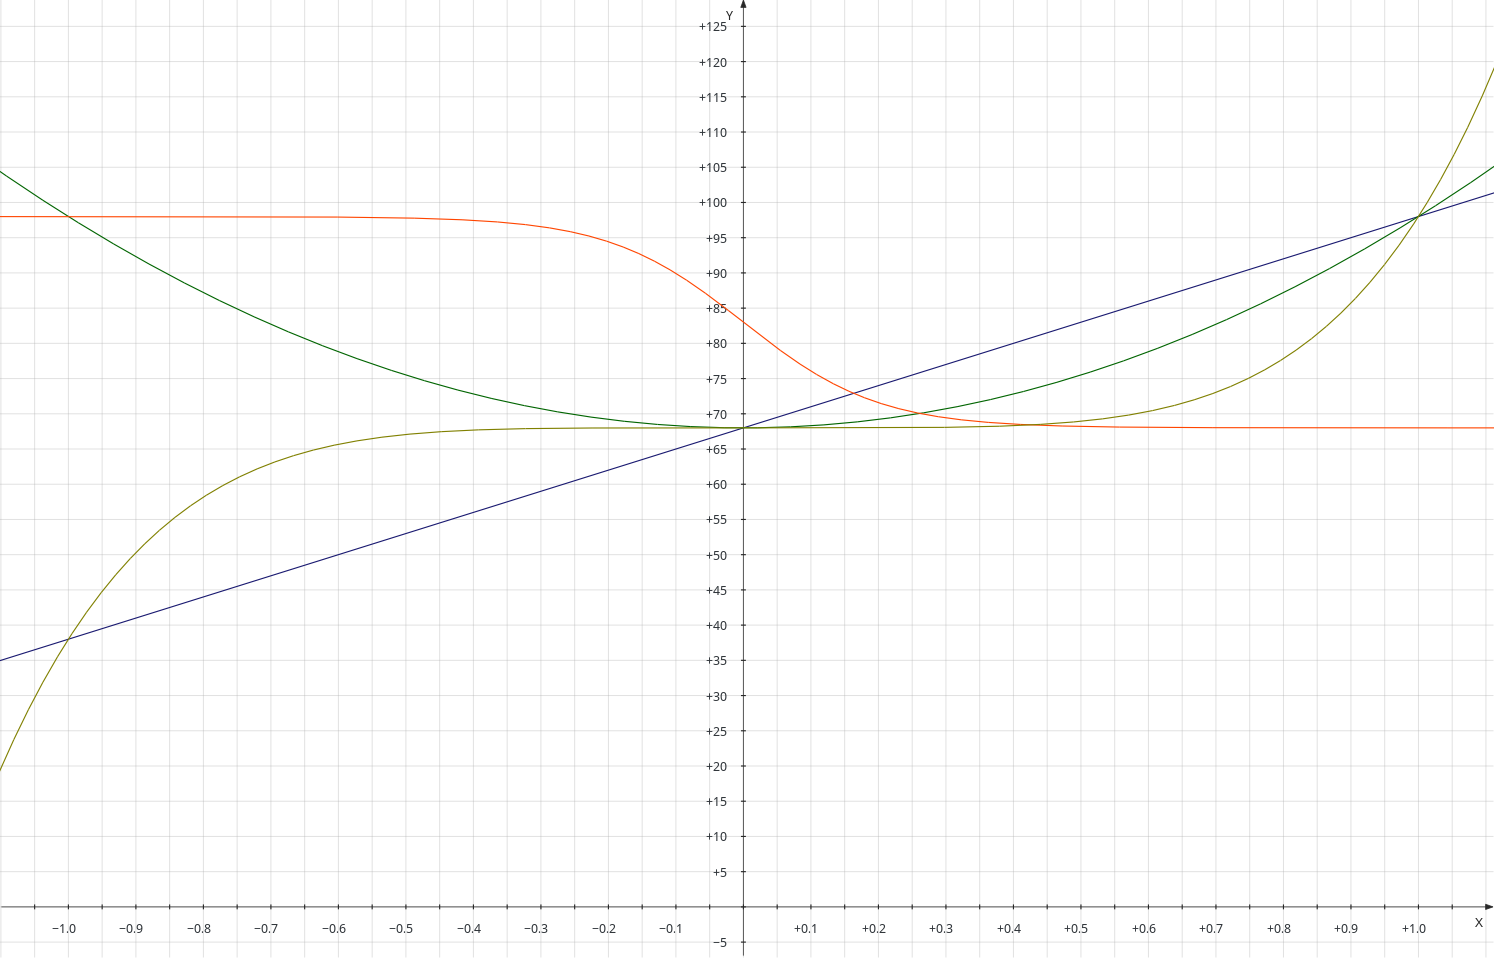
Each of these functions, in mathematical terms, map a value from -1 to 1 to the height. For example, the linear function maps the noise value 0.3 to the height value 77, the quadratic function maps the same noise value to ~71, the 5th-power maps it to 68, and the logistic function maps it to ~69.
Notice how these functions look roughly like the profile of the terrain they generate. Draw a line from a peak to a nearby valley. The noise function will vary relatively steadily along this line, going from 1 to -1, at least with Perlin noise. So when you apply one of the functions above, the terrain will vary approximately according to the function you specify. Knowing this, we can figure out that if we want “smooth” terrain, we have to stick to “smooth” functions. That is, if we don’t want cliffs, we shouldn’t have transfer functions that have cliffs in them.
I use kmplot to plot my transfer functions, but any off the shelf graphing calculator will do as well.
Biome Materials
Another thing we can play around with is what sort of materials a biome is made of. A biome can be constructed of more than one material, if we want. Going back to the river biome I mentioned above, one possible way to do it is to use two different materials for whether the biome is above or at the water level:
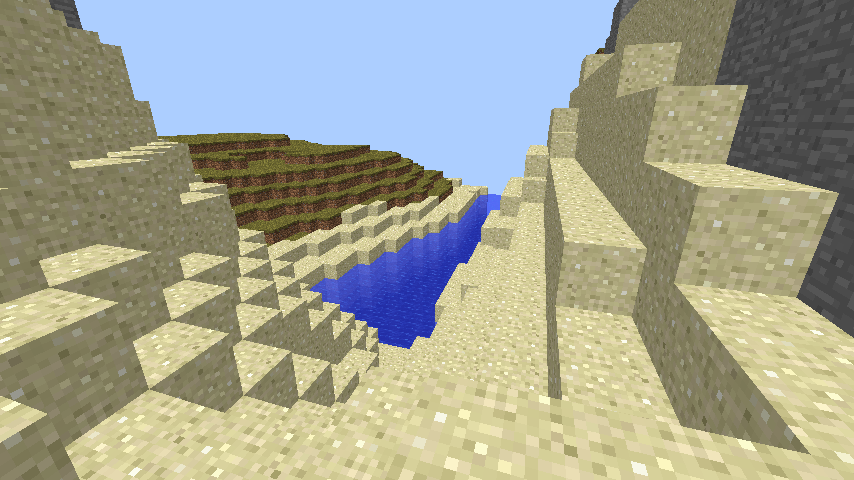
Here, any river biome above water level is replaced with sand. “Water level” is set to 65, even though the biome altitude is set to 64. This is because the river biomes are so narrow, the biome interpolator doesn’t let it get to an altitude of 64 quickly enough to have much water. Another way to solve this would be to change how the biome interpolator treats river biomes, so it gives special weight to rivers.
Conclusion
This is all fine and good, now we know that if we want to create new worlds, we have to investigate the functions generating the world, not just the parameters we’re feeding into the functions (though those are important too). Ordinarily, I would build a framework to let you set those equations and fool around, but I didn’t, so instead I posted the (admittedly hackish) code I used to generate all of these images:
https://gist.github.com/lkolbly/3ff2fc2e2f8ab1c9cc41b4da53ab0209
It requires the com.flowpowered.noise package, as well as the Bukkit API, as well as some plugin code it can live in. This is the tutorial I followed to figure that out:
https://bukkit.org/threads/basic-creating-custom-world-generators.24569/
There are a few problems still remaining with our terrain, though. For one, it looks relatively naked - there is no grass, no trees, very few animals. Also, it doesn’t generate structures, like villages or strongholds. But, both of these are a bit tangential, compared to the biggest problem: There are no overhangs or caverns, two features that make Minecraft’s terrain pop.
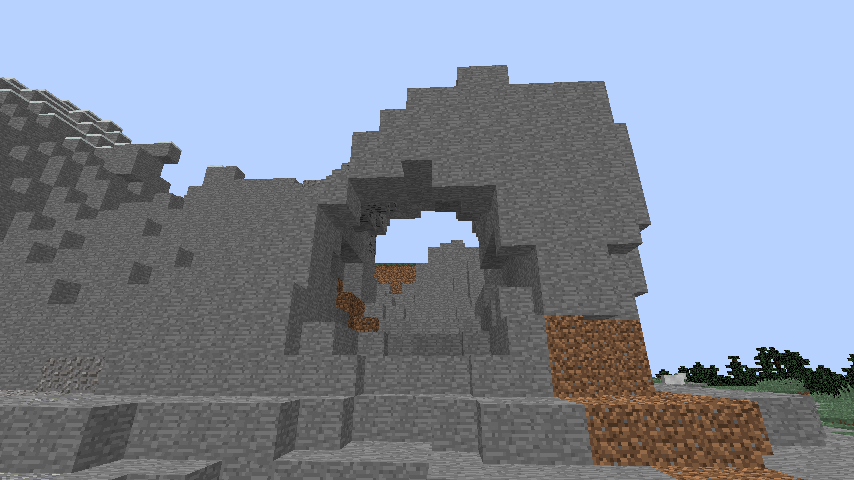
To do overhangs (or floating islands), you have to think about the terrain in 3d terms, not just 2d heightmap terms. Stay tuned, I’ll write about that soon enough.
