Okay everyone, let’s talk about faces. By now, surely you’ve had some relative or clickbait internet article show you a face supposedly generated entirely by a machine (or if you’re of a certain inclination, you’ve seen one of those deepfake videos).
If you’re unsure what I’m talking about, look at this lovely lady:

At first glance, you think: This is a face. But after you look at it for a little bit, you realize there’s a few things wrong with it - her glasses merge into her face a little bit, her hair interacts with the background in ways which don’t make sense, something weird’s going on with the left side of her head (is that jewlery?).
That’s because this person doesn’t exist, and this image has seen no camera. It’s entirely generated using a computer program. I feed the program some numbers, and it gave me that image. For example, I can feed it a different number, and generate an entirely different image:

Again, at first glance, you think it’s a face… but then you see the oddities. There’s a blur on the left. Her hair doesn’t show up behind her glasses. In the lower-left, her neck and hair interact in a weirdly patterned way.
I will stop at this point to encourage you to follow along. You should install StyleGAN from NVidia, from the paper A Style-Based Generator Architecture for Generative Adversarial Networks (2019 Karras et. al.). The code is available on GitHub here, and as long as you have a functioning TensorFlow installation I’ve found it to be quite easy to use - start with the pretrained_example.py file.
You should also install FaceNet, from here. I’m using the 20180402-114759 pretrained model, which was trained on VGGFace2 with an Inception ResNet v1 architecture. I found FaceNet slightly less trivial to get started with, here’s an example command line usage:
$ python .\src\compare.py ..\20180402-114759\20180402-114759\20180402-114759.pb ..\..\stylegan-master\stylegan-master\results\a.png ..\..\stylegan-master\stylegan-master\results\b.png --gpu_memory_fraction 0.5
Note the gpu_memory_fraction parameter. Without it, CuDNN was having trouble allocating enough memory.
Okay, now with that out of the way, let’s have some fun.
We have a function which takes in (a vector of numbers) and spits out (a face). Obviously, we can play with the initial vector of numbers however we want - for example, you can linearly interpolate them:
def generate_gradient(a, b, N):
    delta = np.subtract(b, a) * 1.0 / (N - 1)
    res = []
    for i in range(N):
        res.append(np.add(a, delta * i))
        pass
    return np.array(res)
If you’re a bit rusty on how vectors work: What this is doing is taking a start point, a, and an endpoint, b, and generating N steps from a to b.
You can plug that into pretrained_examples, and then generate some vectors like so:
    # Pick latent vector.
    rnd = np.random.RandomState(6)
    latents = rnd.randn(2, Gs.input_shape[1])
    latents = generate_gradient(latents[0], latents[1], 10)
    print("Built latent vector {}".format(latents.shape))
Then, you can pass that to the model as-is:
    # Generate image.
    fmt = dict(func=tflib.convert_images_to_uint8, nchw_to_nhwc=True)
    images = Gs.run(latents, None, truncation_psi=0.7, randomize_noise=True, output_transform=fmt)
Before finally saving them all to a directory:
    # Save image.
    for i in range(len(latents)):
        png_filename = 'results/{:04}.png'.format(i)
        PIL.Image.fromarray(images[i], 'RGB').save(png_filename)
    print("Saved all images")
If you evaluate each of these vectors, you do in fact end up with a seeming gradient from one face to another:

On the left we have the first face, on the right the other face, and in between a mix. The second face (we’ll call her Margeret) seems to dominate over Elise, by the middle of the mix the face is more Margeret than Elise, and the last three images are all pretty much Margeret.
But we have FaceNet, which can classify images (a function that turns a face into a vector of numbers), so we objectively measure the similarness of these faces.
$ python.exe ./src/compare.py ../20180402-114759/20180402-114759/20180402-114759.pb ../../stylegan-master/stylegan-master/results/000*.png --gpu_memory_fraction 0.5

...

Distance matrix
        0         1         2         3         4         5         6         7         8         9
0    0.0000    0.5394    0.7412    0.8937    1.0999    1.0493    0.9677    1.1059    1.1846    1.0843
1    0.5394    0.0000    0.4311    0.7544    1.0013    0.9784    1.0022    1.1287    1.1808    1.0998
2    0.7412    0.4311    0.0000    0.5356    0.8036    0.8890    1.0044    1.1364    1.1894    1.0820
3    0.8937    0.7544    0.5356    0.0000    0.5765    0.8297    0.9914    1.1030    1.1599    1.1142
4    1.0999    1.0013    0.8036    0.5765    0.0000    0.5749    0.8730    1.0781    1.1583    1.0657
5    1.0493    0.9784    0.8890    0.8297    0.5749    0.0000    0.5876    0.9053    0.9778    0.8590
6    0.9677    1.0022    1.0044    0.9914    0.8730    0.5876    0.0000    0.6219    0.7701    0.6531
7    1.1059    1.1287    1.1364    1.1030    1.0781    0.9053    0.6219    0.0000    0.4504    0.5146
8    1.1846    1.1808    1.1894    1.1599    1.1583    0.9778    0.7701    0.4504    0.0000    0.4230
9    1.0843    1.0998    1.0820    1.1142    1.0657    0.8590    0.6531    0.5146    0.4230    0.0000
So to clarify: What compare.py does is compute the vector for each face, then determine the “distance” between every pair of vectors (think of each vector as starting at the origin and pointing to some point in space).
This text table is a little tricky to read, let’s make a graph of the first row:
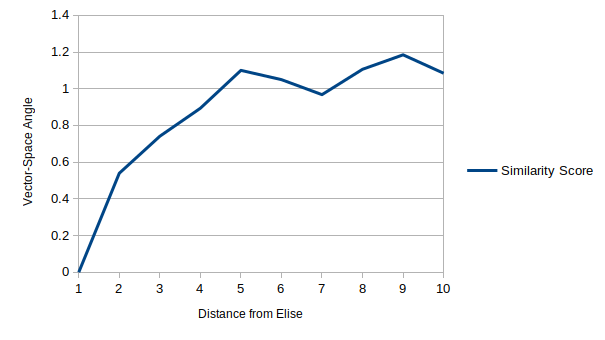
This matches what we had subjectively determined - that the images fairly quickly turn into Margeret. For some reason the images briefly become closer to Elise before settling into full-Margeret mode.
Of course, you can take this further, and write a script which repeatedly a) generates a “target” vector, and then b) generates faces based on the interpolated vectors. Nothing a little bit of Python can’t do:
def trajectory(tweens):
    gen = Generator()

    rnd = np.random.RandomState(6)
    start = rnd.randn(1, gen.input_shape)[0]
    for i in range(10):
        target = rnd.randn(1, gen.input_shape)[0]
        latents = generate_gradient(start, target, tweens)
        gen.mkimgs(latents, i*tweens)
        start = target
(the design of the Generator class is left to the reader, but source code available on request.)
Some of the failure modes are interesting to see, as well. Does this guy have glasses or not?

It’s easy to see how this might happen. It’s difficult to imagine with these 512-element vectors, but imagine if we condensed those 512 dimensions into a 2-dimensional plane.
Heck, screw imagining that, let’s actually do that. We can arbitrarily define a plane by choosing an origin and two other vectors, let’s choose Elise as the origin, Margeret as our X-axis, and some other random third “person” as our Y-axis:
def plane_embedding(gen, x, y):
    rnd = np.random.RandomState(6)
    latents = rnd.randn(3, gen.input_shape)

    # (0,0) is at Elise, (1, 0) is at Margeret, (0, 1) is a random third thing
    res = np.add(latents[0], np.add(latents[1] * x, latents[2] * y))
    gen.mkimgs(np.array([res]))

if __name__ == "__main__":
    tflib.init_tf()
    gen = Generator()
    for x in range(10):
        for y in range(10):
            plane_embedding(gen, x / 5 - 1, y / 5 - 1)
If we run that and build a montage of the result, we see that we have a region of pictures-with-glasses:
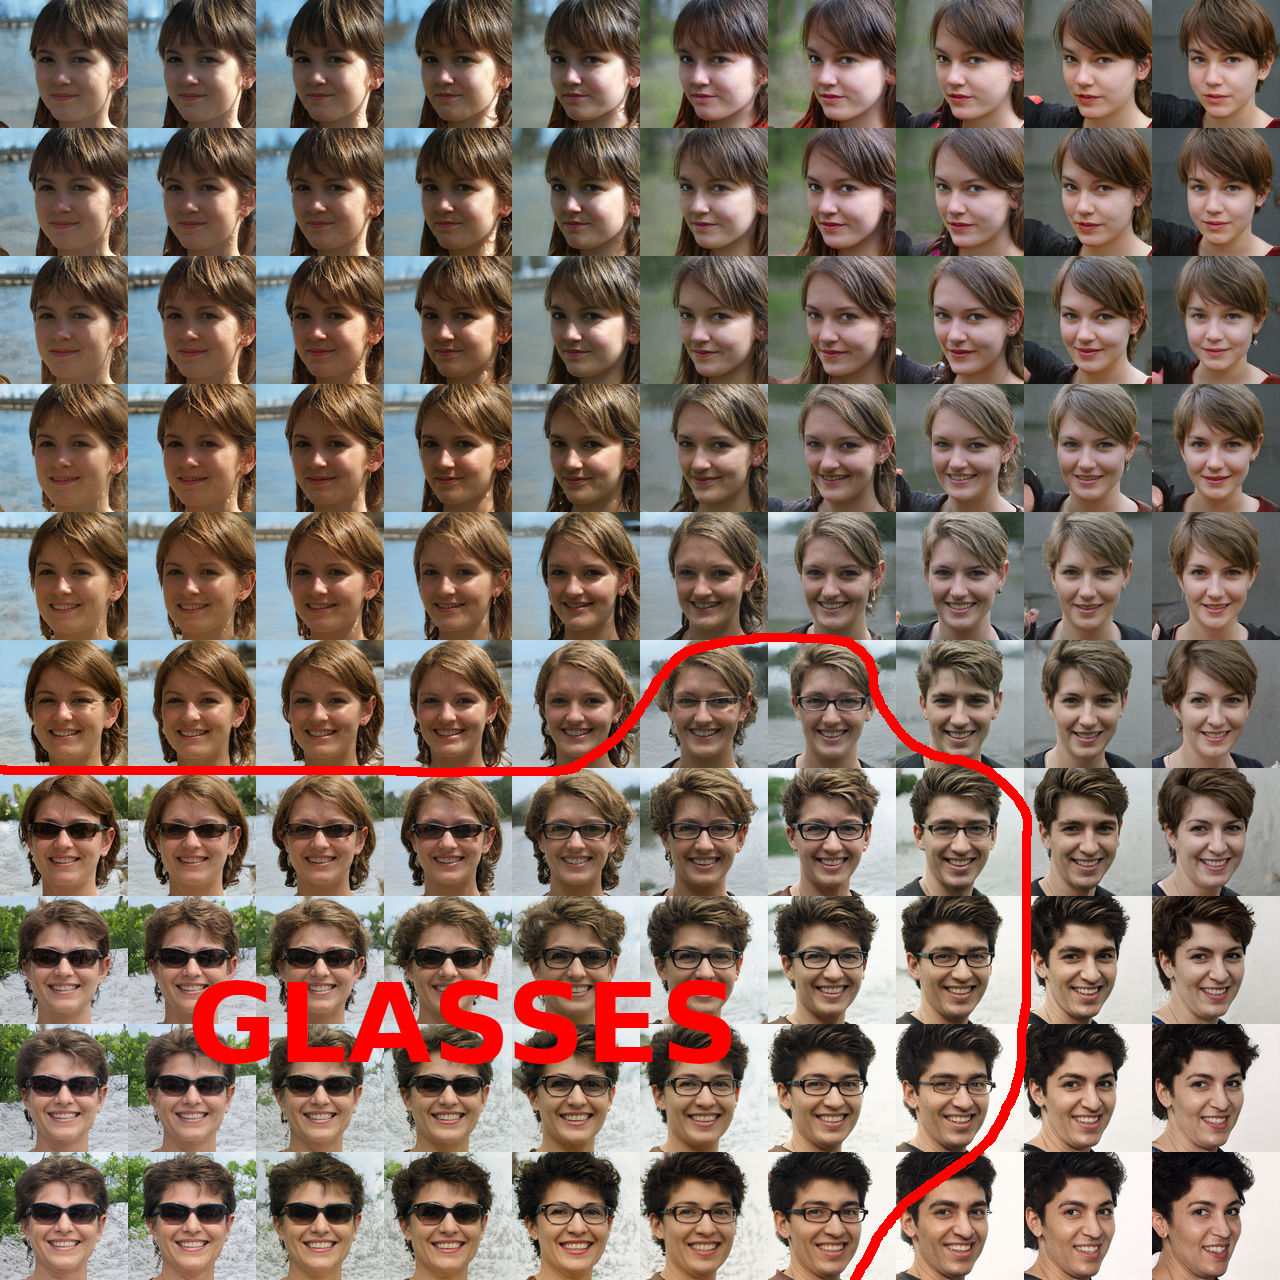
You can see that all of the pictures with glasses are clumped together in the lower-left. This visualization isn’t perfect, since it’s a plane in cartesian space, whereas a mapping from 2d space to the 512-dimensional sphere would be a better fit. But this is close enough.
It does raise the question, though, of what face you get if you pass the zero vector:
gen.mkimgs(np.zeros((1, gen.input_shape)))
Gives us:

Huh, for some reason I thought it’d be a man. Also, sorry if you look like that, I think you’re beautiful even if you are literally the most average person.
I can play with vectors all day. What about each axis? We can construct the vectors <1, 0, ...., 0>, <0, 1, 0, ..., 0> and so on:
for i in tqdm(range(gen.input_shape)):
    v = np.zeros((1, gen.input_shape))
    v[0][i] = 1.0
    gen.mkimgs(v)
And the result is… a lot of faces:
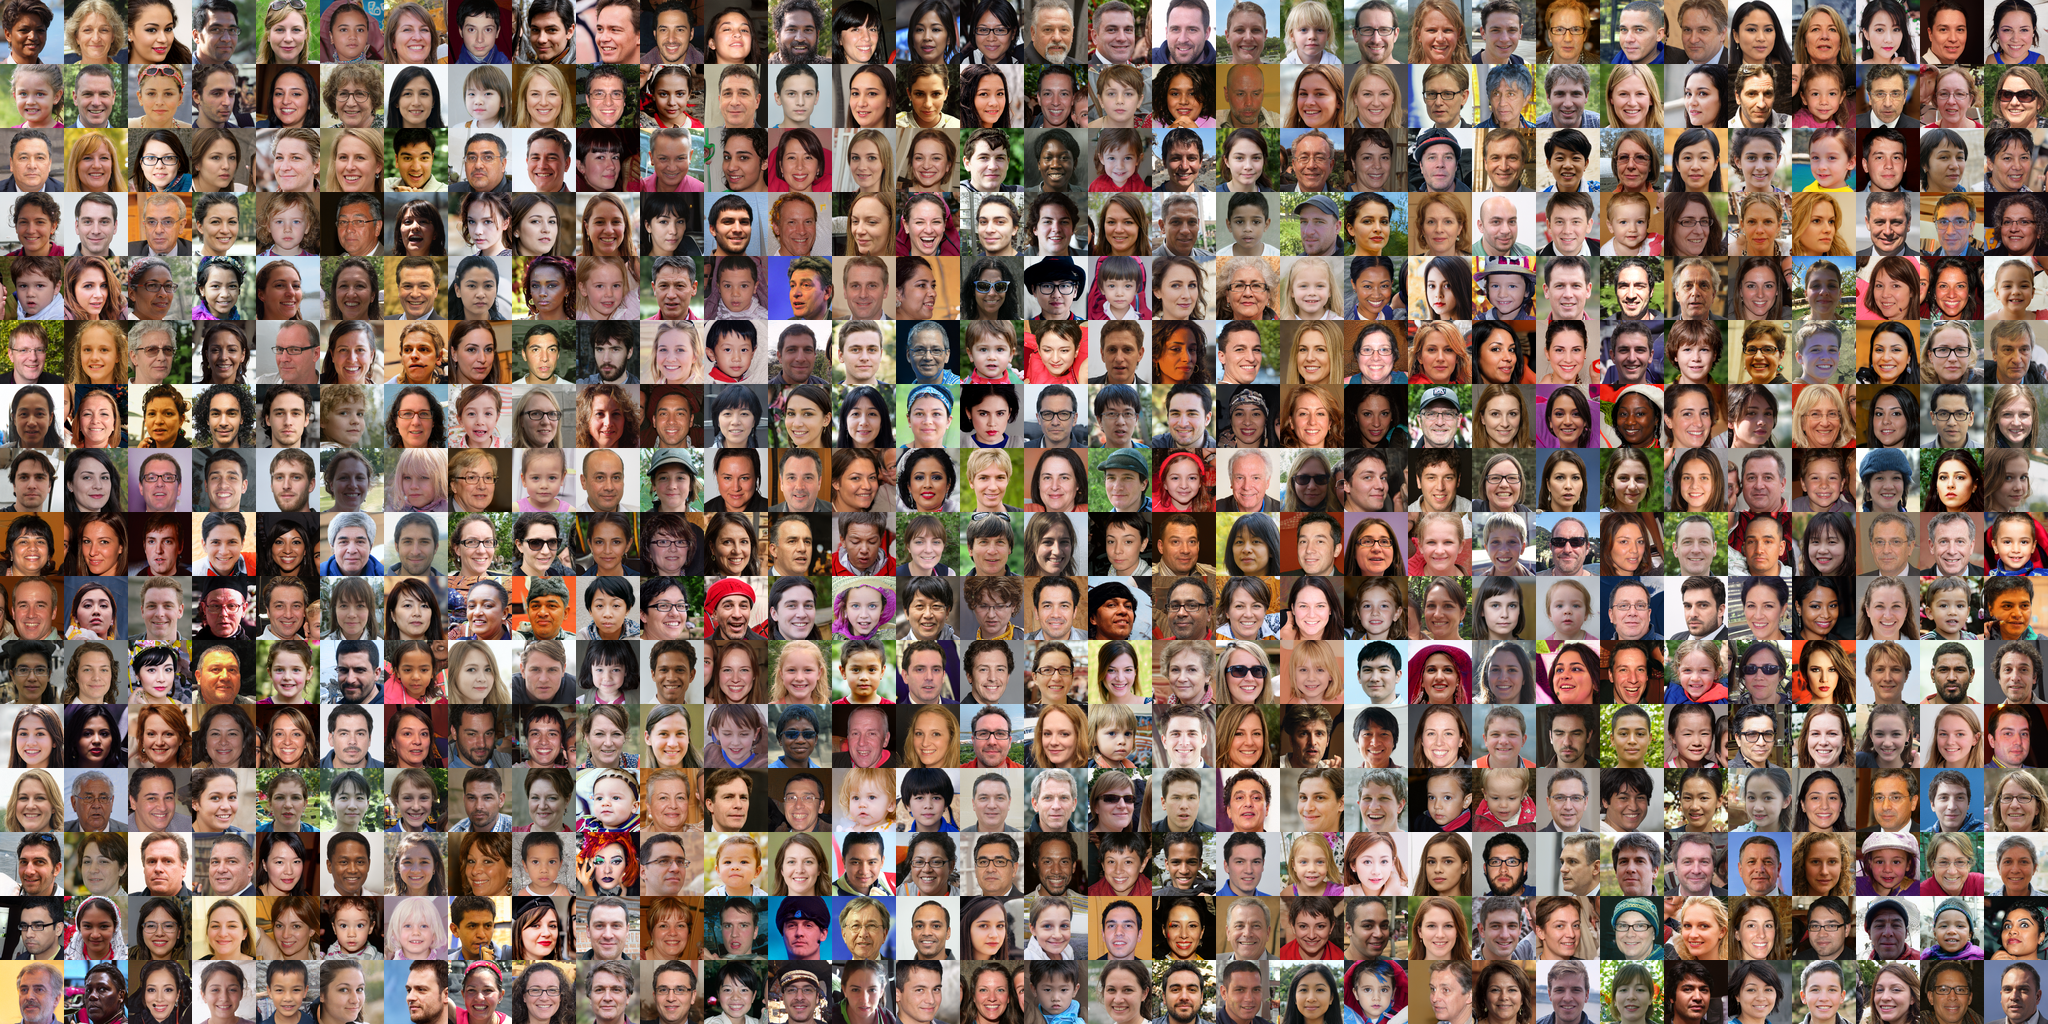
At that resolution, they all look indistinguishable from real faces. Indeed, even at their highest resolutions, some of them are indistinguishable:

And even most of them look reasonable at first glance, but have something weird going on with jewlery or hair adornments:

It’s particularly bad at the sunglasses-on-the-head thing:

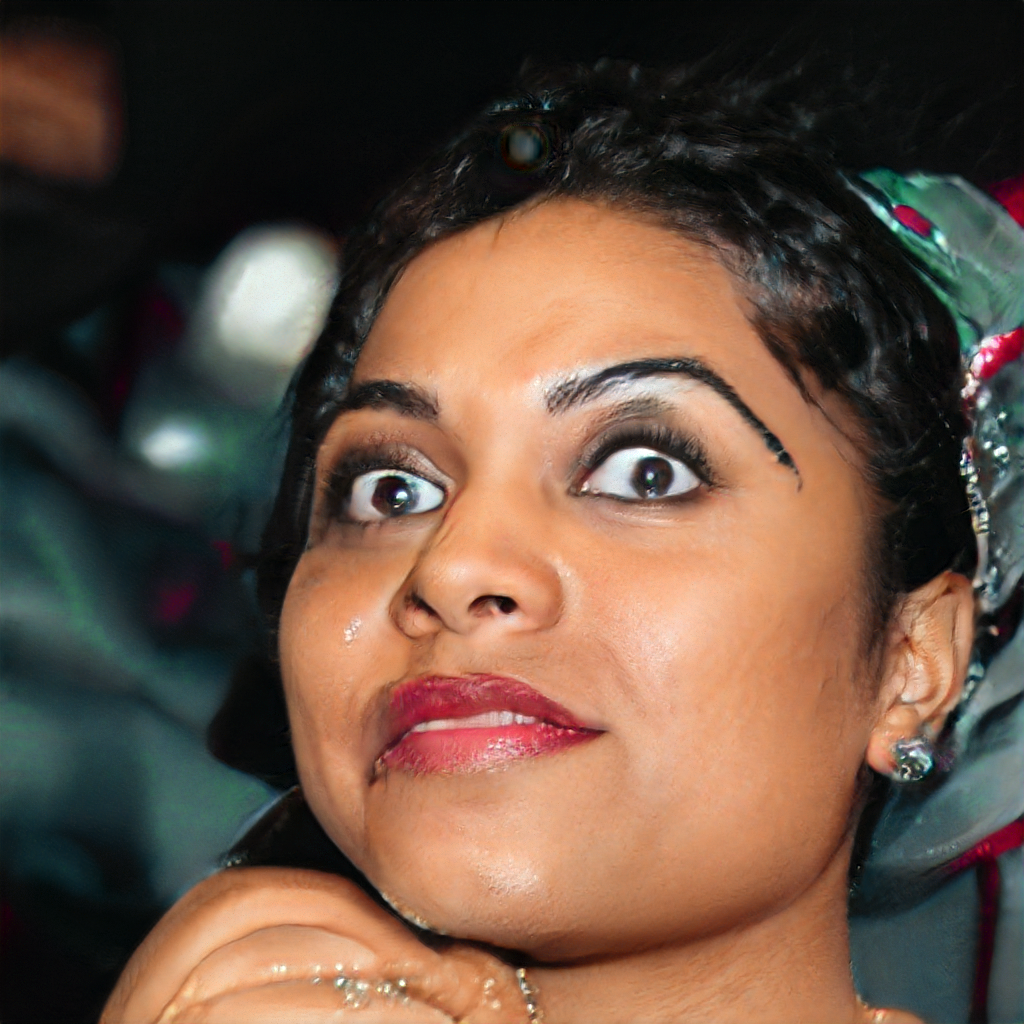
And a few of them are downright scary:
Of course, if we have the ability to generate faces from a vector, and the ability to detect similarity of faces to a reference face, we can perform a search to find faces similar to the reference face. For simplicity and performance, I tested with squashing the vector space down to a 6-ish dimensional space (picking 6 of the dimensions, and keeping the rest at zero), and the search performed reasonably well:
The target:

And the result is visually similar:

Though I’m not entirely convinced those are the same person, it’s certainly closer to the target than other faces in the same space:

I suppose if I had let it run longer (this search ran for only a few minutes), it could’ve found a better face.
For reference, the search used SciPy’s dual_annealing optimization algorithm, with Nelder-Mead as the local minima search, terminating after the distance to the reference face drops below 0.9 (which is fairly loose, but tighter bounds took much longer to compute).
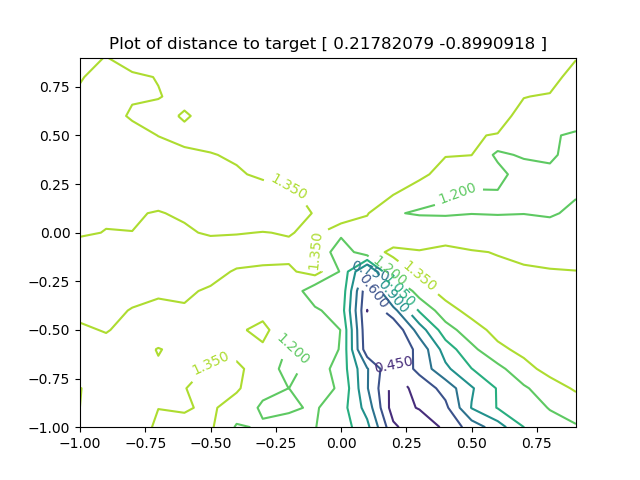
To help visualize the hill climbing process, this is a graph of the facial distance to a given target in the 2D face space:
Okay, one more neat experiment and then I’ll let you go. Again, as we have a function which maps 512-dimension vectors to faces, and another function which maps faces to 512-dimension vectors, we can run these together one after another (pick a random vector, and compute a face - from that face, compute the “embedding” vector, and use that vector to seed another face). In principle, eventually the function should either loop, or should reach a fixed point.
In practice, the vector space is so big and the iteration time so large, I believe it would be difficult to encounter either situation before the universe runs out of time (and Austin Energy cuts me off).
The results of running this iteration for sixteen thousand faces (with 15 faces interpolated between each keyface) can be found on YouTube here
